OsX on Asus P5N7A-VM (vanilla)
This post referred initially to the installation of Leopard (10.5.6); it is now updated to include Snow Leopard. In short: it works, currently updated to 10.6.8
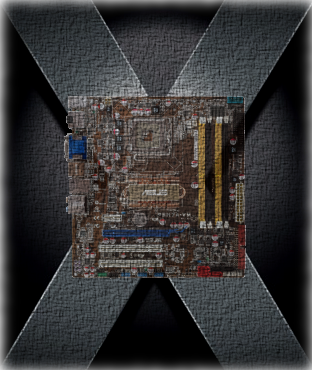
Leopard on the cage
At insanelymac there is a discussion on how to install Leopard on the P5N7A-VM using the boot-132 method.
I had built my PC without a CD-ROM (this is intended to be my server), and, as you could read on the previous discussion, the USB ports are all but useless, so I was out of luck to install Leopard on the usual boot-132 terms.
However, I had two running Leopard machines, a Mac mini and a hackintosh, so I decided to install Leopard on a separate hard disk, and set it up completely for the P5N7A-VM motherboard, where I would move later the disk. It worked beautifully, and the single feature not right is the shutdown/restart functionality. I can live without that. The USB works now perfectly (at 480 Mbs), and Os X updates are installed without a glitch.
The only problem I have found is rebooting into Os X after working in Ubuntu. In this case, the network driver does not work; the solution is to shutdown the Ubuntu server completely (power off the computer, not just software shudown) before starting Os X. Again, something I can handle.
This is my hardware:
- Cpu: E5200.
- Motherboard: Asus P5N7A-VM (with Nvidia 9300 GPU)
- Memory: 4Gb (2 Corsair PC2-800).
- Hard disk: Hitachi 500 Gb
- A hotswap rack
- PSU: Be Quiet 300 W
- Case: LianLi PCV-350B, with 2 120mm and 1 80 mm fan, regulated by the motherboard, plus another 90 mm fan on mini Ninja Cpu cooler. I have also a Thermalright HR-05 cooler for the GPU, without fans. The case is almost silent, the PSU is the noisest component, and it is pretty silent.
The installation required 9 steps. Obviously, most of these steps apply to any motherboard, as far as the right drivers are available. I include first a detailed description of the steps I executed for the P5N7A-VM motherboard, and then a generic description for any motherboard.
Attention: update via software update to 10.5.8 does not work: Ethernet is lost, but easily recovered, and sound is gone, without solution so far. I will try next VoodooHDA, as I did with my P5Q-E hackintosh.
Steps for P5N7A-VM
- The first step is to install Leopard on a free partition (20 Gb). I used retail 10.5.6. This installation can be done:
- Using a Mac, directly, just specifying the free partition.
- Using the hackintosh, I had to install the retail DVD in yet another free partition (9 Gb), and then boot it using then boot-132 method. As usual, it ends with error.
- Now, it is needed to setup the installed partition. For that, reboot first on the working Mac / hackintosh
- Copy the DSDT.aml for the associated CPU. This file was provided by Diabolik, and is available here; have a look at this forum in case that newer versions are published. In the same place is available the DSDT.dsl required for quad cores. Note that this file must be copied on the root directory in the installed partition.
- Install Chameleon on the installed partition, including the Extra files, although most of them are not needed.
- The previous step created an Extra folder in the root directory in the installed partition. It contains a file com.apple.Boot.plist where I added a timeout of 1 second to boot into Os X, specifying:
<key>Timeout</key><string>1</string>
- In the same directory, I included my own smbios.plist, although this is only needed to have nice values displayed on the About this mac dialog.
- Under this directory, enter the folder Extensions. It should only contain the following kexts:
- AppleDecrypt.kext: directly included by Chameleon
- IOAHCIBlockStorageInjector.kext: directly included by Chameleon
- OpenHalRestart.kext: directly included by Chameleon
- AppleHDA.kext: provided in the insanelymac forum, by frodokenny, required for the audio to work. This driver comes with the next one:
- HDAEnabler.kext
- Now, it is needed to set the correct access rights for each file. So, eject the installed partition, open a terminal window and mount again the partition (preserving rights) on the terminal doing something like:
sudo mount -t hfs /dev/disk1s2 tmpdir
where tmpdir is any temporal directory, and disk1s2 must be correctly specified (look at the Disk Utility program for the identity assigned to the installed partition).cd tmpdir sudo chown root:wheel DSDT.aml sudo chown -R root:wheel Extra
- Finally, rebuild the Extensions.mkext files found in
the /Extra and /System/Library folders. To do so,
I have created the file updateMkext.sh in the /Extra
folder, with the following code:
KEXT_RETAIL="../System/Library/Extensions"
KEXT_EXTRA="../Extra/Extensions"
MKEXT="../Extra/Extensions.mkext"

kextcache -v 1 -t -l -a i386 -m "$MKEXT" "$KEXT_EXTRA" "$KEXT_RETAIL"
This script was provided by the user zhell in insanelymac. To execute it:cd /Extra sudo ./updateMkExt.sh
Now, the hard disk with the newly Leopard installed can be swapped to the final machine, with the P5N7A-VM motherboard. Of course, to start it, it is needed a boot partition manager, and I used Grub, already installed in a separate hard disk.
That is all. I still copied the installed partition into the hard disk normally used in my machine, to avoid having two hard disks installed, but this step is obviously not required.
Summary for any motherboard
I am sure this summary works for any motherboard, if you are able to get the right drivers (kexts), which is obviously the difficult part. In addition, it requires a working Mac or hackintosh:
- Install from a Mac/Hackintosh Leopard (I used 10.5.6) on a separate partition on the final hard disk.
- Reboot into the working Mac/Hackintosh, mounting the final hard disk as well.
- Unless the BIOS is patched (or is directly supported), copy DSDT.aml or DSDT.dsl to the root of the installed partition.
- Install Chameleon on this partition.
- Prepare convenienly the Extra folder. This is a trial and error loop, until all required kexts -and none more- are there. It must be also ensured that the access rights to all the files in this folder are correct (owner: root, group: wheel).
- Swap the hard disk to the final machine, and ensure you can boot it (Grub is my best choice)
Installing Snow Leopard
See below for Snow Leopards updates after initial installationThe update from Leopard to 10.6.0 followed the same steps: use a different machine (hackintosh) to perform the update, using a separate hard disk, then include the required drivers, boot on the target P5N7A-VM hackintosh, and copy the created partition into the target disk. Finally, reinstall chameleon.
Something is to be considered here: the same boot loader cannot boot Leopard and Snow Leopard, so my solution is to keep both on separate hard drives, each with its own boot loader.
All files included below are zipped on the file SnowLeopardCustom.zip
- Install Snow Leopard on a free partition (10 Gb) in a GUID-partitioned hard disk, and boot it, using the boot-132 method (using a USB stick, in my case). Then, clean install or update the current Leopard partition.
- Now, it is needed to setup the installed partition. For that, reboot first on the working Mac / hackintosh
- Install Chameleon on the installed partition, excluding the Extra files. In particular, whatever is the version you install, it is needed to install the boot fiel provided on Chameleon 2.0 Rc3 (r658 package), and none of the earlier versions. In this moment, it is only possible to perform an easy install of Rc1, while Rc3 requires a custom installation: in this case, use the easy Rc1 installation, and then just override the boot file on the root directory with the boot file included in Rc3 (included in the attached file),
- The previous step created an Extra folder in the root directory in the installed partition. It contains a file com.apple.Boot.plist where I added a timeout of 1 second to boot into Os X, specifying:
<key>Timeout</key><string>1</string>
- In the same directory, I included my own smbios.plist, although this is only needed to have nice values displayed on the About this mac dialog.
- Copy the DSDT.aml for the associated dual core CPU -the same as used in Leopard-. Note that this file must be copied on the Extra directory in the installed partition, and look to the notes above if your CPU is not a dual core.
- Under this directory, enter the folder Extensions. It should only contain the following kexts:
- fakesmc.kext
- IOAHCIBlockStorageInjector.kext: avoids orange icons
- OpenHalRestart.kext
- Copy the file AppleHDA.kext into the /System/Library/Extensions folder in the installed partition. This controls the ALC1200 Realtek audio, provided here.
- Now, it is needed to set the correct access rights for each file. So, eject the installed partition, open a terminal window and mount again the partition (preserving rights) on the terminal doing something like:
sudo mount -t hfs /dev/disk1s2 tmpdir
where tmpdir is any temporal directory, and disk1s2 must be correctly specified (look at the Disk Utility program for the identity assigned to the installed partition).cd tmpdir sudo chown root:wheel DSDT.aml sudo chown -R root:wheel Extra
USB issues
With the settings indicated above, and without additional changes, the system will be working, but with some issues. In special, rebooting and shutdown works only some times. Other times, the system takes ages to reboot or shutdown, if it even manages to do so. And starting the system becomes as well difficult, requiring normally starting it with "-v" option in chameleon. With this verbose flag set, the startup will show many errors related to the USB subsystem (some assertions also related to the sound), but the system can finally start. If you read through the forums, you can see that the root of the problem lies on the incomplete BIOS of the motherboard, which lacks an option to enable the EHCI handoff.
For me, these are just minor issues, as the reboot / shutdown / start process is quite unusual for me, as I rather put the system on sleep. This changed last week, when I bough a nice Apple keyboard, which refused to work under the existing conditions.
The best solution to solve all these issues is to disable the USB legacy option on the BIOS. This implies that the UBS keyboard becomes useless until the OS starts, which could have been an issue in the normal pre-conditions, where I was habitually forced to setup the verbose flag in Chameleon to start the system. But now, all the issues are gone, and the system properly boots / reboots / shuts down.
Still, I would need now to enable USB support on my boot loader (Grub, but the USB support is quite uncomplete), and I will be still unable to modify the startup settings in Chameleon. The PS/2 port comes now to the rescue, as I can always plug a PS/2 keyboard and setup any required Chameleon settings. I guess there is always a trade-off to pay....
Display issues
Although I have stated that the hardware works fine with Snow Leopard, there are many features that I could be missing. For example, I have no microphone connected to this hackintosh, so I cannot be sure if its audio drivers work as expected. Yesterday (10th January 2011), I was pointed to another problem: changing the screen resolution produces a blue screen; a cycle sleep/wake up will solve this problem.
I haven't had yet the time to investigate into the problem, but I believe it could be solved with the BIOS settings related to the card; otherwise, patching properly the DSDT, as explained on this post.
Snow Leopard updates
10.6.1 & 10.6.2
Updates to 10.6.1 and 10.6.2 run smoothly, using the default Software update. The only problem is that sound is lost, but the solution is easy.
The best is, before upgrading, to save a copy of the existing sound kext. This is the file /System/Library/Extensions/AppleHDA.kext. Otherwise, it is also available in the file SnowLeopardCustom.zip, or in the original web site.
After upgrading, restore this kext into the original location /System/Library/Extensions. This is better accomplished using the tool Kext helper.
10.6.3 & 10.6.4
The update to 10.6.3 and 10.6.4 has the same problem, but, in addition, USB stops working when the computer goes to sleep; it is needed to re-plug any USB device . I have tried quite a few DSDT hacks, but nothing worked. I tried also using the SleepWatcher daemon to unload/load related kexts, but that is neither working. The only working solution is reinstalling a previous IOUSBFamily.kext (10.6.2 or 10.6.1). This is not a nice solution, but better holding back on a single kext, that holding on an old release (10.6.2) for just this one kext.
With this solution, it is still possible to use the keyboard to wake up the computer, but all plugged USB disks will be ejected without being properly unmounted. Please note that, in fact, this was already the situation on 10.6.2 (in that case, the same would happen, without the error message!)
10.6.5
Nice update, really smooth, it even corrects the USB problems that have appeared on the previous two releases. It is only needed to restore the sound kext, as detailed above.
The restoring of the previous IOUSBFamily.kext is not anymore needed. Note that all plugged USB disks are still ejected without being properly unmounted, but the keyboard/mouse will continue working after a sleep/wake up cycle.
Sweet.
10.6.6
The best update ever, nothing stopped working!
10.6.7
Perfect update, nothing broken during the update.
10.6.8
Sound lost on the update, so the AppleHDA.kext must be reapplied, as it had happened regularly on every update up to 10.6.5.