10th May 2020Setting up Ubuntu, 20/04 edition
 For the LTS editions of Ubuntu,
I prefer to start with a new slate, copying my SSD disk to some external backup, and performing a destructive
installation, erasing the whole SSD. And as this means having to reconfigure Ubuntu completely, I keep
my record of all the steps I take
For the LTS editions of Ubuntu,
I prefer to start with a new slate, copying my SSD disk to some external backup, and performing a destructive
installation, erasing the whole SSD. And as this means having to reconfigure Ubuntu completely, I keep
my record of all the steps I take
I have updated my Ubuntu setup to list these steps: how to configure workspaces, how to define my shortcuts, how to make Guake start at runtime, etc.
9th May2020New optmatch version, first non beta
 Version 1.0.0 of
optmatch is now available on pypi.
Version 1.0.0 of
optmatch is now available on pypi.
After two years without issues, I took advantage of the need to update the documentation to include the new references to Github hosting to update the version to non beta.
7th May 2020Moving from Bitbucket
 Exactly five years ago, almost to the day,
in May 2015, I had to move my source repositories from
Google Code
to Bitbucket.
Exactly five years ago, almost to the day,
in May 2015, I had to move my source repositories from
Google Code
to Bitbucket.
At that moment, Google Code recommended Github as hosting replacement, but I preferred to keep using Mercurial. Five years later, all my professional experience relates to Git (with some usage of SVN and even still CVS), and I can definitely understand the shift on focus in Bitbucket, deprecating any Mercurial usage.
However, Bitbucket's total lack of support on how to migrate existing projects to Git is definitely a regrettable attitude after these years of great support. There are good tools to support the migration from Mercurial to Git -I used myself fast-export, but Bitbucket does not support the conversion of a repository from Mercurial to Git, even if the upload of the converted files were a manual process. And deleting the repository and creating a new one would mean the loss of the project's issues.
I decided to move to Github, and the move was helped with a tool to migrate the issues directly from BitBucket to Git. I tried using this other tool at first, but it gave me too many problems. In any case, they are proof of the issues that many people are having with the demise of Mercurial support at Bitbucket...
Farewell, BitBucket.
7th May 2020TableFilter v5.5.2
 New release for this
Java library, with no functionality changes at all, just
required to update the documentation and links after the move from Bitbucket
New release for this
Java library, with no functionality changes at all, just
required to update the documentation and links after the move from Bitbucket
The source code and the issues management is now hosted in Github, and of course, the code has moved from Mercurial to Git. It is a funny coincidence: I started using SVN for the version control, and moved to Mercurial the 5th May 2010, using Google Code to host the repository. Exactly five years later, the 5th May 2015, I had to move from Google Code to Bitbucket, and almost exactly other 5 years later, the 7th May 2020, I have completed the migration from Bitbucket to Github. Which means ten years and two days of good Mercurial support. Shame that Bitbucket is kicking it out...
4th May 2020Internal GPU
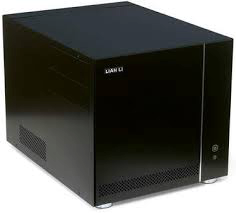 The Intel HD Graphics 4000 included in my aging i3770 CPU cannot handle the 3840x1600 resolution of my new
monitor, so I had to shop for a new GPU card. I believe I should I have stayed with my initial choice, a
passive GT1030, but at the end I choose the max power than my 400 watts PSU could feed: a GTX 1650 super.
The Intel HD Graphics 4000 included in my aging i3770 CPU cannot handle the 3840x1600 resolution of my new
monitor, so I had to shop for a new GPU card. I believe I should I have stayed with my initial choice, a
passive GT1030, but at the end I choose the max power than my 400 watts PSU could feed: a GTX 1650 super.
I had expected a easy setup, disabling the internal GPU and initialize only the PCI express GPU, but my motherboard was crashing continuously. At the end, the only BIOS settings allowing me to boot was having the internal CPU enabled and setting the GPU initialization to Auto or IFGX (internal).
Using Ubuntu 20.04, no configuration is needed to use simultaneously the internal GPU and the Nvidia card, all worked flawless immediately when attaching a monitor to each GPU.
4th May 2020Spoiled geek
 Spoiled geek:
geek who orders a 38" monitors and, on first impression, thinks: is not THAT big.
Spoiled geek:
geek who orders a 38" monitors and, on first impression, thinks: is not THAT big.
Funny part, I wrote in 2011 on the same impression I had with
a 30" monitor, the Dell U3011,
But, in fact, this time I think it is the right impression. It is very wide, about 20 cm wider than the 30" monitor, but it is also narrower: 5 cm smaller, but with small bezels, so it just translates to 3 cm less display height. Which I don't miss: it is easier (at least to me) the horizontal neck move than the vertical one.
My original intention was to get a 34 curved wide monitor. Glad I decided this size, and in fact, I am left wondering on the much bigger, but equally priced Dell U4919DW. The last one is much more curved, but it is also (3 cm) narrower, with 30 cm more width than my 38" selection. This made me think that the ergonomics were quite a bit skewed. Plus, I was considering a move from 30" to 34" and then to 38", so a 49" monitor was really one step too long. But perhaps the extra curvature helps with the ergonomics, perhaps up-sizing to 49" would have been the good, bold move...
3rd May 2020DD-WRT issues
 In the last 24 months, I have added three entries to
this blog. As all procrastination woes go, there is an excuse: I intended to move my static site generation
from my own custom solution to Hugo, but I didn't dedicate it time enough and the migration never happened,
but on the meantime I would just not write more entries...
In the last 24 months, I have added three entries to
this blog. As all procrastination woes go, there is an excuse: I intended to move my static site generation
from my own custom solution to Hugo, but I didn't dedicate it time enough and the migration never happened,
but on the meantime I would just not write more entries...
My custom blog solution is a C# program I wrote almost 15 years ago, so I fully intend to move to Hugo or else in some future time. It works fine, and pretty fast (a few seconds for this site), but would take me many hours any single modification. I had even also a python solution to synchronize my local folders to my server's location, which at some time in the last 15 years was replaced by a simple rsync script, which, of course, expect some direct connection to the port 22 on my dynamic public IP address. For security reasons, that port is closed on my home router, and I only open it when required.
As complexity increases with time, my previous port opening moved to... multiple ports opening, as I had decided to secure a part of my home network. But trying to access the final router, where I had flashed DD-WRT, I couldn't remember the password, and it was not available in my KeePass files, so after many many logon attempts, I had to reset the firmware. And, for the sake of it, upgrade the router.
But upgrading, or installing the DD-WRT firmware is not simple. If you visit its wiki, you receive a big warning to not use the router database. It offers two alternatives: Kong builds, which additional testing are not available since July 2019, and beta builds, which, by definition, seem a coin toss.
After upgrading, I had still network access, but the Wifi access was gone. SSIDs were broadcast, radios were on, but my phone couldn't see them. Funny point, the DD-WRT Status page offers a gadget to scan the network, but it was asking me to enable the Wireless network -of course, giving no hints on how to do so...
Solution was the usual way: reboot the router, and the 2.4 GHz SSID appeared in my phone. To get also the 5 GHz SSID I had to move the wireless channel from Auto to a specific channel. My router is a Netgear WNDR 3700, its last official Netgear firmware is dated on 2011. I am definitely glad the only issues I had with the DD-WRT firmware were so easy to solve.
22nd February 2019TableFilter v5.5.1
New release for this
Java library, implementing some requested functionality
regarding the automatic hiding of filter popups during table model updates.
It was on the pipeline for two months, but other things kept popping up and delaying this release.
19th June 2018New optmatch version
Version 0.9.2 of
optmatch is now available on pypi.
It solves the issues raised so far, and it cleans up some implementation details
14th May 2018Argument parsing in python
Almost 10 years ago, I thought about
implementing a new solution for arguments parsing in python.
Basically, existing solutions (now and then) instruct a parser on the expected options and flags, and the parser handles the arguments, catching any errors and producing a beautiful help summary automatically. The major issue is the flexibility of the parser to define the correct arguments syntax: for example, whether it is possible to specify incompatible options, flags, etc.: two options --verbose and --quiet can be incompatible, or action scan could require a mandatory --source option. Additionally, if the parser is flexible enough to provide this functionality, it can be quite difficult to program, or to make changes at a later stage.
My idea was to define class methods that could handle each possible combination of arguments, and the parser would extract that information without further effort from the programmer. That is: express what each operation requires, and expect that the parser would handle all the required logic:
class Example(OptionMatcher):

	@optset
	def handle_common_flag(self, mail_option):
		...

	@optmatcher
	def handle_compression(self, file, compress_flag=False):
		...

	@optmatcher(flags='verbose', options='mode')
	def handle(self, file, verbose=False, mode='simple', where=None):
		...
It does not only simplifies arguments handling, and expresses clearly the purpose, but adding / removing options or flags or operations is in fact very easy
I implemented this solution shortly after, and then started adding functionality as required. Looking to the history of the project, I invested around 10 months on this projects, although I do not remember anymore the associated effort -the optmatch.py file has just 800 lines of code, plus comments, plus tests and documentation-.
And then I used it in some of my projects, a few people contacted me about it, and it was included in a some other projects, but it was definitely not a success. In fact, when I needed to do arguments parsing on scripts at work, I would normally default to a standard solution argparse
A few weeks ago I was once again in the dilemma of creating a minor personal application, and I started using argparse. Soon I got into the familiar territory of having incompatible options, flags for only specific actions, and to express different actions under the same script. This meant adding code after the parsing to handle all these issues. And, after a while, adding a new option required quite a lot of effort just to handle all properly, so I remembered my own unloved library, and decided to give it a try, again.
And that was it, like falling for some old love :-)
So I have spent a few hours updating the library -it was only supporting camel case notation on parameters, and now it supports the more standard underscores-, and, more importantly, uploading it to the standard Python Package Index (PyPI), so it can now be easily installed as:
pip install optmatch. Even better, support for python 2 and 3 is now included in a single file.
11th December 2017Bollocks UI
 I read this interesting article on the (wrong) effect of using flat UI, where users are found to require longer times to grasp the meaning of the UI elements in web pages, delaying therefore their actions.
Bollocks, but not so much as trying the latest Nautilus interface, the default file navigator in Ubuntu 17.04. Creating a new folder requires double clicking on the folder contents and selecting the firt option (New folder). But note that selecting the parent folder and right clicking shows a menu where the option to create this new folder does not appear. Furthermore, Nautilus has an application menu, but the option to create a menu is all but missing.
When you right click on the folder content, the first option is indeed 'New Folder', and it displays very handily its shortcut: Shift+Ctrl+N. BUT: what happens if the folder contains too many files/sub folders? There is no way to right click on empty content, and there is no way to create a new folder except by knowing the shortcut.
I guess that one or more developers went just too far on their quest to simplify the interface.
5th December 2017OS Agnostic
 Yep, after 6 months in Ubuntu land, the Wayland switch -or the associated bugs- dropped me back into the arms of
Hackintoshing
Yep, after 6 months in Ubuntu land, the Wayland switch -or the associated bugs- dropped me back into the arms of
Hackintoshing
Not happy about it, but Wayland is at the moment no go in my configuration; and MacOs installation was really simple, just a couple of hicups. The whole installation process is described here
Switching operative systes is now an almost painless process. I do not rely on the cloud to store my files -just a few ones, which in fact host most of my configuration information. As a result, installing a new operative system normally implies:
- The OS installation itself -30 minutes for Ubuntu, a few hours for Hackintosh
- OS Configuration, a 15 minutes process once I have it correcly documented
- Programs installation, a 60 minutes process, using software centers and command line
- Copying my common folders, either from the old drive or from a backup, which takes up to 3 hours-.
5th December 2017Ubuntu 17.10
 Six months ago, after repeated issues with Hackintosh, I moved to Ubuntu 17.04, and all was well.
Then it came Ubuntu 17.10, with the move from Unity, and the introduction to Wayland, and man, was that a big change. It was supposed to be, like every last Ubuntu releases, a minor upgrade, almost more of an update than a real move.
Suppossitions.
But. That workspaces do not work anymore as they used to do with Unity, that shortkeys seem to only work randomly, that Steam seems much slower and it seems to exhibit a gap between the cursor pointer and the exact pointed location are for me just inconveniences; but that whenever the monitor goes to sleep, Wayland performs a swift Harakiri, with all X programs getting killed, is a major showstopper. I cannot justify all the lost time.
What is special on my setup to produce such an outlier crash? No idea, I use a embedded Intel HD 4000 solution with DisplayPort connection; I have tried disabling DCI on the monitor, without success. For me, Ubuntu 17.10 is, on this machine, no go.
I have filled a bug for this problem , but no solution or activity so far...
I could stay with 17.04, but that means a very short security period with upgrades. I could try installing 16.04, a LTS solution, or, as I have done, let the upgrade Ubuntu 17.10 in place, hoping for updates to solve my issue, and have a new Hackintosh try, on a separate drive. Let's see how the fight Ubuntu Wayland vs Hackinstosh works for me in the close future...
Note: on 28th November, I have switched back to Ubuntu, upgraded, dist-upgraded and rebooted. But Wayland persists on its suicidal ways....
1st May 2017DisplayPort on Ubuntu
 There is an
ongoing issue with using
monitors in Ubuntu connected via DisplayPort: monitor shows black screen and "no input signal"
after turning the monitor off and on manually
There is an
ongoing issue with using
monitors in Ubuntu connected via DisplayPort: monitor shows black screen and "no input signal"
after turning the monitor off and on manually
Turning off a DisplayPort-connected monitor is treated the same as disconnecting it, and somehow X11 does not recover from this. I have seen this error related to Nvidia and Radeon cards, but in my case I have a Intel HD4000, and the error is exactly the same.
And it happens with just all kind of monitors, including my Dell U3011. A proposed solution is to disable DDC/CI on the monitor itself, but this didn't solve anything for me.
A solution I have found is to press Ctrl+Alt+F6 (or +F5, etc), to open a TTY console, and then pressing Ctrl+Alt+F7 to get back to X11. But it works sporadically, sometimes having to press these keys several times, or creating new TTY consoles, like pressing Ctrl+Alt+F2 to create a TTY2 if the 6 had been already created before.
Other provided solution is to ssh from another machine and run:
env DISPLAY=:0 xset dpms force off
env DISPLAY=:0 xset dpms force on
In this case, the best option is to create a shell script /usr/local/bin/display-port-wake-up.sh with this content, open Settings, Keyboard, Shortcuts, and create a custom shortcut (in my case, Ctrl + Alt + W). This solution works always, but there is a catch: the shortcut is only available when the user is logged in, so if the system is asking the user password to unlock the screen. the shortcut will not work. In this case, it is needed to enter blindly the password, press Enter, and then press the shortcut.
30th April 2017Moving Ubuntu to separate disk
 After a few weeks with my new Ubuntu installation,
I was able to do all my usual tasks without missing OsX. So far, I have found only two issues: display port
monitor not awaking some times, and some crashes in Steam.
After a few weeks with my new Ubuntu installation,
I was able to do all my usual tasks without missing OsX. So far, I have found only two issues: display port
monitor not awaking some times, and some crashes in Steam.
But the main issue has appeared when trying to it setup for Android development... and running out of space. So, the original hackintosh disk, which was in standby, had to go, and the idea was to clone my existing installation to the other disk.
So I reformatted the hackintosh drive, just to find that I had removed the EFI partition that booted the Ubuntu system... My solution was to launch the Ubuntu installer, and install Ubuntu again on the new drive (the previous Hackintosh drive), taking care of having one EFI partition, plus a big ext4 one. Once I had Ubuntu installed, I launched again the installation system, mounted the old partition under /media/old, and the new one under /media/new, and then copied all the important files:
sudo cp -R --preserve=all bin/ etc/ home/ lib/ lib64/
            opt/ root/ run/ sbin/ usr/ var/ /media/new/
Then edit the file /etc/fstab to change the UUID of the disks, and presto!
13th April 2017Setting up Ubuntu
Setting up a Ubuntu computer seems
to be my fate of late. And each time I do it, I need to do the same Google searches: how to configure workspaces, how
to define my shortcuts, how to make Guake start at runtime, etc
So I have collected all the steps I take to configure a Ubuntu machine, from a generic point of view, not describing all the applications I finally use, but definitely including all details to configure Ubuntu as I like it. It seems weird to show these steps for a Ubuntu 16.10 installation on the same day that Ubuntu 17.04 is published, but I will definitely comment on any changes.
12th April 2017Ciao, Hackintosh
 I have been setting up my computers as
Hackintoshes since 2009; currently I have a Mac laptop, with the latest Sierra installation, and a Dell laptop, running
Ubuntu 16.10, plus two desktop computers, one running Windows Vista and Snow Leopard (yep, both run still perfectly fine),
and the other with MacOs Sierra. At work I use exclusively Linux, and I had been wondering for a long time on
my reasons to keep my Hackintoshes at home.
I have been setting up my computers as
Hackintoshes since 2009; currently I have a Mac laptop, with the latest Sierra installation, and a Dell laptop, running
Ubuntu 16.10, plus two desktop computers, one running Windows Vista and Snow Leopard (yep, both run still perfectly fine),
and the other with MacOs Sierra. At work I use exclusively Linux, and I had been wondering for a long time on
my reasons to keep my Hackintoshes at home.
As of last weekend, this question has been answered, fare well, Hackintosh. I will keep the old desktop running Snow Leopard, and my Apple laptop running MacOs, but I definitely see no point on not using Ubuntu as my first OS choice. My choice is rather simple to do, as none of the programs I use lack a Linux version, with the exception of Evernote, which I can still handle via its Web interface.
10th January 2017Batch editing Google contacts
 The new Google contacts application is very nice.
It looks great, and it offers good functionality, like merging of duplicates. Editing contacts works perfectly, but it can only be done one contact at a time.
I was migrating contacts from a non smartphone, and the migration had converted them into an ugly 'Family name; surname' format, such as 'Trumpy; Donald'.
And as slick as the user interface is, editing by hand over 300 contacts was a boring perspective.
The new Google contacts application is very nice.
It looks great, and it offers good functionality, like merging of duplicates. Editing contacts works perfectly, but it can only be done one contact at a time.
I was migrating contacts from a non smartphone, and the migration had converted them into an ugly 'Family name; surname' format, such as 'Trumpy; Donald'.
And as slick as the user interface is, editing by hand over 300 contacts was a boring perspective.
Automation to rescue: export contacts, process them with a python script, import them again. Do, in Google Contacts, press 'More', then export, then read the popup warning and head to the old Google Contacts application, as the new one seems to be unable to export the contacts. Press again the More button, again on export, and choose Google CSV format.
The script to convert the contacts is as simple as:
 import csv
 with open('google.csv', newline='', encoding='utf16') as f:
     contacts=list(csv.reader(f))

 for contact in contacts:
     colon = contact[1].find(';')
     if colon > 0:
         name = "%s %s" % (contact[1][colon+1:], contact[1][0:colon])
         contact[0] = contact[1] = name

 with open('google-out.csv', 'w', newline='') as f:
     csv.writer(f).writerows(contacts)
This reads the exported google.csv file, and creates a new google-out.csv file; in the old Google Contacts application, remove now all contacts, and then initiate the Import process, passing the created file. Easy as pie.
The previous script shows a very basic transformation; the important aspects are: (1) it is needed Python 3 to run this script, as its CSV reader handles properly the unicode format. (2) The input format seems to be UTF-16 (it was definitely on my OsX machine). (3) However, it was reimported as UTF-8 without issues.
26th November 2016Finally! oh, no!
 I have a Macbook Pro 13" early 2011. I upgraded it manually, the memory to 8Gb and the hard disk to a SSD of 128 Gb (and later to other of 256 Gb).
Battery is down to about 3 hours and I was planning to buy the revamped Macbook Pro as soon as it would be released.
So I was one more of those Macbook Pro fans completely astonished to see what Apple was releasing.
I have a Macbook Pro 13" early 2011. I upgraded it manually, the memory to 8Gb and the hard disk to a SSD of 128 Gb (and later to other of 256 Gb).
Battery is down to about 3 hours and I was planning to buy the revamped Macbook Pro as soon as it would be released.
So I was one more of those Macbook Pro fans completely astonished to see what Apple was releasing.
Personally, the touch bar seems a total compromise: missing the touch screen (which I am neither fond of), lacking real useful buttons (wrong, the useful buttons seems to be always on on the touch bar), and looking like the Apple way to say 'Look, we are innovating!'
My macbook is RELIABLE; has come with me to really remote areas in Bangladesh, Philippines, Benin, Eritrea or Mozambique, and it has answered like a pro. The available ethernet connection has saved me more times than I could count. The magsafe connector has very probably avoided a few accidents and when/if it gets even retired, my macbook pro should get its own urn.
What is offering now Apple? Only USB-C (oh, well), no magsafe (sigh!), no ethernet connector (augh!), touch bar (oh, my, my), solded memory and storage ($*&#^$!)? Together with an old CPU (okaysh, but not very okaysh), and the limitation of 16 Gb (yeah, I know, more memory would impact battery time). And then, the butterfly keyboard, which is unpleasant, and seems not that reliable. See that I do not even mention the price; I would not mind paying the Apple tax for a worthy product!
My company provided me with a Dell XPS 13, developer edition, and I was thinking about hackintoshing it. I have 3 hackintoshes -all desktops-, and this was looking like a good way to get a proper Apple laptop without the limitations of the latest Apple models.
But is this the case? The XPS 13 has more connectors, but still lacks the one I consider important (Ethernet), which is just not possible with laptops this thick (but I do not care about their thickness!!). As in the Macbook, the memory is soldered, so you get what you buy, and that is also limited to 16 Gb. In Luxembourg, the only XPS 13 Linux with 16 Gb memory comes with a 512 Gb SDD (256 would have been enough for me, specially when it can be upgraded), and with the touchscreen at great resolution (basic 1920x resolution is enough for me, specially when i t improves battery life,and touchscreen is something that I still need to find useful), it costs, with core i7-7500u processor, 1800 euros, with an ongoing promotion down to 1600 euros. It has approximately the same size as the Macbook Pro, and for me, the same limitations.
Screen-wise, the Dell has higher resolution, and the Apple better brightness -which at this size it means for me a bonus point for the Apple-. The Dell's keyboard is better, and the trackpad works good, but it cannot be compared with the Macbook pro. I like / love linux, but the desktop experience is subpar to MacOS, and the full integration with the hardware means that even when the Macbook battery is smaller, its performance would be normally better that on the Dell.
The Macbook Pro, 13 inches without the silly touch bar costs 1875 euros. This provides a 256 Gb SSD, enough for my taste, but goes up to 2100 euros for the 512 Gb SSD. The core i5 processor (i5-6360U), can be upgraded to (i7-6660U), for 'just' 350 euros, raising the total price to 2445 euros. So, the Dell XPS13 with a newer i7 processor costs 645 euros less, and with the current promotion, 800 euros less, a cool 33% cheaper. I find in fact a better approach opting for the touch bar version, and staying with the core i5 version -the i7 is anyway only dual core-. For 'just' 2165 euros you get 16 Gb memory, 256 Gb SSD and a core i5 a 2.9 GHz, plenty speedier than the non touch-bar one (hint: Apple wants you to get the touch bar)
Personally again, I think that the Apple is all but Pro. I do not think that the Dell is more Pro at all, just cheaper for the same ambitions. If I would go now the Apple way, I think I will try a real 4-core machine, on its 15" envelop. The basic 15 inches gives a 4 core processor, 16 G memory and 256 Gb SSD for 2600 euros, including a discrete graphics card in the mix.
Or, well, I will just give up on these manufacturers, and enjoy my Dell for the time being, perhaps I will hackintosh it for the pleasure of it, and I guess I will still invest some money on Apple stock... and on a new battery for my reliable Macbook 2011 (real) pro.
24th November 2016Ubuntu 16.10 on Dell XPS 13 (9350)
 I got a Dell Xps 13 recently, the
developer edition that comes with Ubuntu. It is not the latest model (9360), with the Kaby Lake processor,
but the previous one (9350) with Skylake. These two versions differ not only on the processor,
but also on the Wifi card and the Ubuntu version; while the 9360 model comes with Ubuntu 16.04 installed,
Dell does only provide Ubuntu 14.04 for the 9350 model.
I got a Dell Xps 13 recently, the
developer edition that comes with Ubuntu. It is not the latest model (9360), with the Kaby Lake processor,
but the previous one (9350) with Skylake. These two versions differ not only on the processor,
but also on the Wifi card and the Ubuntu version; while the 9360 model comes with Ubuntu 16.04 installed,
Dell does only provide Ubuntu 14.04 for the 9350 model.
Ubuntu 16.04 includes Linux kernel 4.4, with incomplete support for Skylake processors; kernel 4.6 included specific support for Dell XPS 13 systems, and Ubuntu 16.10 comes with kernel 4.8. Installing Ubuntu 16.10 on this laptop is a no-brainer, all works fine directly.
My laptop is the model with touchscreen and high resolution (3200x1800); the fonts appear too little, so it is better to go to settings / displays and choose a 2x scale (or any scale at will).
The other problem that appears with the touchscreen is that Ubuntu installs by default a library implementing braille support. Entering
sudo tcpdump -i loshows a lot of traffic on the loopback interface from port 4101. To disable it:
sudo apt-get purge brltty xbrlapi(which an additional reboot)
Although everything works fine, there are some quirks. For example, the touchscreen works until the machine goes to sleep with the closed lid. To have it working again, it is needed to close-reopen quickly the lid.
10th November 2016TableFilter v5.3.0
New release for this
Java library, implementing some requested functionality: the possibility
to filter entries that contain some text -initially, the default operator would only display entries
starting with a given expression
21st March 2016VirtualBox guest additions on headless
 Normally, I run virtualbox machines in headless mode,
so it is useless installing an OS with full GUI. I favor in this cases a debian installation (minimal, using
the netinst CD), and ensuring that PAE/NX is enabled in System/Processor.
Normally, I run virtualbox machines in headless mode,
so it is useless installing an OS with full GUI. I favor in this cases a debian installation (minimal, using
the netinst CD), and ensuring that PAE/NX is enabled in System/Processor.
It is still helpful to install the virtualbox guest additions to improve the performance, but the usual way -Devices/Install Guest Additions CD Image...- doesn't work. In this case, the best procedure is to download them and perform a manual install. For the current version, 5.0.16:
cd /tmp
wget http://download.virtualbox.org/virtualbox/5.0.16/VBoxGuestAdditions_5.0.16.iso
mkdir iso
sudo -s
apt-get install -y dkms
mount -o loop VBoxGuestAdditions_5.0.16.iso iso
sh iso/VBoxLinuxAdditions.run --nox11
umount iso
rm -Rf iso VBoxGuestAdditions_5.0.16.iso
This will install the extensions, and produce a final warning:
Could not find the X.Org or XFree86 Window System, skipping.
This warning is okay. It is possible to check if the additions are installed by invoking:
lsmod | grep vboxguest
20th March 2016Rclone
 A few years ago, I setup a poor man backup system for a
site using rsync and Dropbox.
Eventually, the database and associated files required more than 2 Gb, and still following the poor man habits,
I had a look at
A few years ago, I setup a poor man backup system for a
site using rsync and Dropbox.
Eventually, the database and associated files required more than 2 Gb, and still following the poor man habits,
I had a look at
But there are several unofficial clients. Like gsync, which tries to provide rsync functionality, being still severely limited. I opted better for other client, rclone, which does not only support GDrive, but also Dropbox, Amazon S3, Backblaze, etc. The documentation is very complete, the setup really simple, and its functionality covers all my scenarios.
Installation instructions only cover directly Linux, and for some reason it puts the executable into sbin, which is all but useful -the idea is to be executed, with different credentials, by each user. Finally, I used the following instructions for Linux:
cd /tmp
wget http://downloads.rclone.org/rclone-v1.28-linux-amd64.zip
unzip cd rclone-v1.28-linux-amd64.zip

sudo cp rclone-v1.28-linux-amd64/rclone /usr/local/bin
sudo chown root:root /usr/local/bin/rclone
sudo chmod 755 /usr/local/bin/rclone

#install manpage
sudo mkdir -p /usr/local/share/man/man1
sudo cp rclone-v1.28-linux-amd64/rclone.1 /usr/local/share/man/man1/
sudo mandb
rm -Rf rclone-v1.18-linux-amd64*
And almost the same instructions for OsX:
cd /tmp
wget http://downloads.rclone.org/rclone-v1.28-osx-amd64.zip
unzip rclone-v1.28-osx-amd64.zip

sudo cp rclone-v1.28-osx-amd64/rclone /usr/local/bin
sudo chown root:wheel /usr/local/bin/rclone
sudo chmod 755 /usr/local/bin/rclone

#install manpage
sudo mkdir -p /usr/local/share/man/man1
sudo cp rclone-v1.28-osx-amd64/rclone.1 /usr/local/share/man/man1/
rm -Rf rclone-v1.18-osx-amd64*
18th March 2016Two factor authentication with SSH
 This must be
the best way to strengthen the security on your
ssh connection for those cases where ssh keys are not available.
This must be
the best way to strengthen the security on your
ssh connection for those cases where ssh keys are not available.
Tip copied from this arm-blog
10th January 2016Redmine on Debian
 Added
instructions to install
Redmine on Debian, using PostgreSQL and Nginx.
Added
instructions to install
Redmine on Debian, using PostgreSQL and Nginx.
The main problem was in fact setting up correctly email support (and then, trying to scape the SPAM folders in Google).
More entries