A PythonFu example
To manipulate images, I normally use ImageMagick or the GIMP. The former usually on my server web applications, as part of some automation script, and the later covering almost any situation. One feature that makes GIMP much more powerful is its possibility to run scripts, or plugins, written in python or scheme; this is specially interesting to perform repetitive tasks (like in plugins), but also to create programmatically specific images.
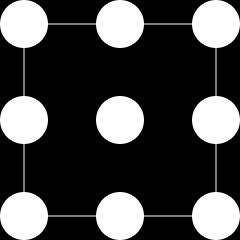
Next image, for example, is a great candidate for programmed generation; I use this image in a web application as am html image map: the user can choose any of the circles on the image, which represent areas on the screen. Using image map plus css and javascript, each circle can be alternatively highlighted, as this examples shows -the used html and css are listed below-.
The main problem using PythonFu is the documentation. This document is probably the best resource, but in most cases, writing an script implies a lot of trial and error. Seeing available examples is in my opinion the best help that I have found on PythonFu, and that is the reason why I am including my own basic example in this page (with the hope of extending it later). One more thing: making tasks more complicated, some of the procedures available to PythonFu seem to change continuously. For example, the initial script I wrote, targetting a GIMP 2.6 installation, used the methods pdb.gimp_image_insert_layer and pdb.gimp_image_select_ellipse; running the original script in my current GIMP 2.8 installation complains on those methods, so I had to replace it with the available ones: pdb.gimp_ellipse_select and pdb.gimp_image_add_layer (with different number of arguments!).
To start PythonFu, go in GIMP to Filters -> PythonFu -> Console. At some time, not really short, a window will appear showing the python console. The help normally refers to the online documentation, available -for 2.8-, here. A bigger help is available directly on the PythonFu console; the browse button opens the procedure browser, that provides information on the commands available for the script. Now it is just a matter of matching the operation to perform with the right python function.
The following script creates the image shown above. The constant SIZE defines the size of the image, square, as the number of pixels of each side, while the constant RADIO defines the radio of each circle. Here is the full script, conveniently documented. To execute, just paste it on the python console.
pythonfu.py
Download
import gimpfu #access constants

SIZE=240
RADIO=24

#create the image
img=pdb.gimp_image_new(SIZE, SIZE, gimpfu.RGB)

#add layer with 100% of opacity
layer=pdb.gimp_layer_new(img, SIZE, SIZE, gimpfu.RGB_IMAGE, "base", 100, gimpfu.NORMAL_MODE)
pdb.gimp_image_add_layer(img, layer, 0)

#we need it with alpha channel
pdb.gimp_layer_add_alpha(layer)

#access its drawable
drw = pdb.gimp_image_active_drawable(img)

#set background to black, and foreground to white
pdb.gimp_context_set_background((0,0,0))
pdb.gimp_context_set_foreground((255, 255, 255))

#fill the background - black
pdb.gimp_drawable_fill(drw, gimpfu.BACKGROUND_FILL)

#to set the brush, check first for available brushes using  pdb.gimp_brushes_get_list("")
#Exanples of brush with width 3 is '1. Pixel', and with width 1, 'Pixel (1x1 square)'

#set brush to simple pixel (width: 1)
pdb.gimp_context_set_brush('Circle (01)')

#draw a square around the image
ctrlPoints = [RADIO, RADIO, SIZE-RADIO, RADIO, SIZE-RADIO,
              SIZE-RADIO, RADIO, SIZE-RADIO, RADIO, RADIO]
pdb.gimp_paintbrush_default(drw,len(ctrlPoints),ctrlPoints)

#now we draw 9 transparent circles (3 rows x 3 columns)
#a transparent circle means -with an alpha layer-, to select the area and cut it
for x in (0, SIZE/2-RADIO, SIZE-2*RADIO):
	for y in (0, SIZE/2-RADIO, SIZE-2*RADIO):
		#next call was available on 2.6, not on 2.8
		#pdb.gimp_image_select_ellipse(img, gimpfu.CHANNEL_OP_REPLACE,
		#                              x, y, RADIO*2, RADIO*2)
		pdb.gimp_ellipse_select(img, x, y, RADIO*2, RADIO*2,
		                        gimpfu.CHANNEL_OP_REPLACE, True, False, 0)
		pdb.gimp_edit_cut(drw)

#remove any selection
pdb.gimp_selection_none(img)

#and display the image
display=pdb.gimp_display_new(img)
To obtain the result shown above, the image is handled as a image map with the following html code:
<div id='img_wrap'>
	<div id="map_div" class='span-2 last'>
		<a href="#" id='map_div_top_left'></a>
		<a href="#" id='map_div_top'></a>
		<a href="#" id='map_div_top_right'></a>
		<a href="#" id='map_div_left'></a>
		<a href="#" id='map_div_center'></a>
		<a href="#" id='map_div_right'></a>
		<a href="#" id='map_div_bottom_left'></a>
		<a href="#" id='map_div_bottom'></a>
		<a href="#" id='map_div_bottom_right'></a>
	</div>
	<img id='img_map_div' src='pfu.png'>
</div>
That requires these css definitions:
#img_wrap{
	display: block;
	background:black;
	width:300px;
	height:300px;
	margin-left: auto;
	margin-right: auto;
	position:relative;
}
#map_div{
	top:30px;
	left:30px;
	width:240px;
	height:240px;
	position:relative;
	background: yellow;
	/*background:white url(pfu.png);*/
}
#img_map_div{
	top:30px;
	left:30px;
	width:240px;
	height:240px;
	position:absolute;
	z-index:5;
	pointer-events:none;
}

#map_div a{ display:block; position:absolute; }
#map_div a#map_div_top_left{width:48px; height:48px; top:0px; left:0px;}
#map_div a#map_div_top{ width:48px; height:48px; top:0px; left:96px;}
#map_div a#map_div_top_right{width:48px;height:48px; top:0px; left:192px;}
#map_div a#map_div_left{width:48px; height:48px; top:96px; left:0px;}
#map_div a#map_div_center{width:48px;	height:48px; top:96px; left:96px;}
#map_div a#map_div_right{width:48px;height:48px; top:96px; left:192px;}
#map_div a#map_div_bottom_left{width:48px; height:48px; top:192px; left:0px;}
#map_div a#map_div_bottom{width:48px; height:48px; top:192px; left:96px;}
#map_div a#map_div_bottom_right{width:48px; height:48px; top:192px; left:192px;}
Finally, the javascript code to handle the mouse hovering and selection:
pythonfu.js
Download
$(function() {
	var SIDE=240;
	var RADIO=24;
	var SELECTED_COLOR='#5Bc5fF', HOVER_COLOR='blue', NONE_COLOR='yellow';

	var sectionSize = SIDE / 2 - RADIO, diameter = 2 * RADIO;
	var selected = 4, hovered = -1;
	var maps=$('#map_div').children();

	var getSidePosition = function(x){
		var ret = Math.floor(x / sectionSize);
		return (x - sectionSize * ret <= diameter) ? ret : -1;
	}
	var getPosition = function (self, event){
		var offset = $(self).offset();
		var x = getSidePosition(event.pageX-offset.left);
		var y = getSidePosition(event.pageY-offset.top);
		return x===-1 || y===-1 ? -1 : 3 * y + x;
	}
	var colorize = function(which, color){
		if (which!==-1) $(maps[which]).css({'background-color': color});
	}

	$('#map_div').mouseout(function(){
		colorize(hovered, NONE_COLOR);
		hovered=-1;
	}).click(function(event){
		colorize(selected, NONE_COLOR);
		var position=getPosition(this, event);
		if (selected===position){
			selected=-1;
		} else {
			selected=position;
			colorize(selected, SELECTED_COLOR);
		}
		hovered=-1;
	}).mousemove(function(event){
		var pos=getPosition(this, event);
		if (pos!==hovered){
			colorize(hovered, NONE_COLOR);
			if (pos !== selected){
				colorize(hovered = pos, HOVER_COLOR);
			}
		}
	});
	colorize(selected, SELECTED_COLOR);
});