Yosemite on Gigabyte GA-B75M
This post describes the steps to install Os X Yosemite on my system, described here.
My system had already Mavericks installed, so I received the notification to upgrade the system to Yosemite. I started it, using the default Apple procedure, just to download the app image. Once downloaded, I stopped the installation. I intended to do in any case a clean installation, so I didn't even check the possibility of doing an upgrade instead of a from-scratch installation.
After having the Yosemite installation app, I downloaded UniBeast 5.0.2. I used the same BIOS settings already used in Mavericks: default ones, ensuring that XHCI and EHCI handoff are enabled, and VT is also enabled, but VT-D must be disabled.
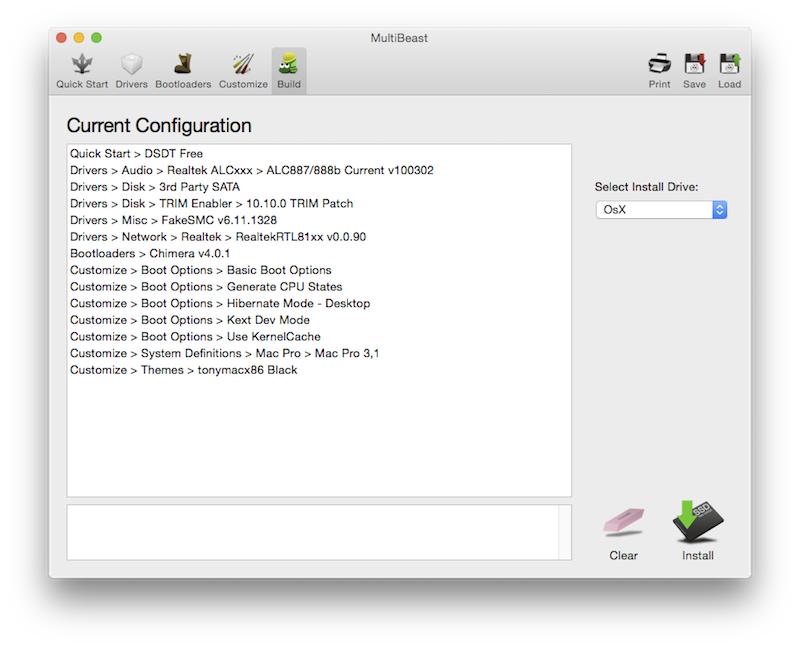
After installation, it is needed to start Multibeast 7.0.2 to fix the correct drivers. The correct installation for my system requires:
- Quick Start: select DSDT free
- Drivers:
- Audio: add ALC887/888b current
- Disk: add 10.10 TRIM patch ( 3rd party SATA already selected )
- Graphics: nothing
- Misc: no changes (FakeSMC already selected)
- Network: Realtek: add RTL81xx
- System: no changes (nothing selected)
- Bootloaders: Chimera (already selected)
- Customize: No changes, already selected:
- Basic Boot options
- Generate CPU states
- Hibernate mode -desktop
- Kext dev Mode (needed to use unsigned kexts)
- Use kernel cache

Checking the logs, I saw that even the AppleHDA assertions displayed on Mavericks were gone. really a flawless go!